
Getting Started
Ever wished you could easily share your Obsidian notes as a simple website? Good news – you can! By combining the power of Obsidian, Git, and GitHub Pages, you can publish your thoughts, knowledge base, or project notes online with minimal fuss.
While diving deep might require a sprinkle of web development know-how (think a little CSS or HTML if you want to get fancy), you can absolutely get a basic site up and running without being a coding guru.
Ready to get started? Let’s go!
The first thing you may need to do is get a GitHub account. They have a free account and the GitHub pages is free. Note: GitHub pages must be public.
Step 1. Create a GitHub repository
First things first, you’ll need a GitHub account. Don’t worry, a free one works perfectly!
Once you’re signed in, create a new repository:
- Click the
+in the top-right corner and select New repository. - Crucially, name your repository exactly like this:
username.github.io(replaceusernamewith your actual GitHub username). This special naming is what tells GitHub to turn it into a website. - Make sure the repository is Public. GitHub Pages works on public repos for free accounts.
- Hit Create repository.
Mind you my repository name is just the Th3Malwar3Club
Step 2: Download Obsidian
If you don’t have it already, head over to the Obsidian website and download the version for your operating system. Install it like any other application.
Step 3: Setting up a Vault
Think of an Obsidian “vault” as just a folder where all your notes and files live. Note: you do not have use obsidian to create the folder, you can just navigate to the location where you would like the folder to exist and create it manually
- Choose a spot on your computer for this folder. A good idea is to name it the same as your GitHub repo (
yourusername.github.io) for consistency. - Open Obsidian. Instead of creating a new vault, choose Open folder as vault.
- Navigate to and select the folder you just created. Now Obsidian is ready to work with your files in that location.
Step 4: Installing GIT
Git is the tool that connects your local files to your GitHub repository. There are various methods to using Git and I began this Git for Windows and later moved to using Windows Subsystem for Linux or WSL because it was more effective.
Using WSL for Git
- Installing WSL via Powershell
wsl --install -d UbuntuThis enable WSL and installs a virtualized default Ubuntu distribution. 2. Reboot before installation is complete 3. Once back, type WSL in Windows search 4. A terminal with start a virtualized ubuntu session 5. In terminal window update and install git
sudo apt update
sudo apt install git

#enter the password you create the Ubuntu system with
Now that Git is installed in your WSL environment, navigate to your Obsidian vault folder from the WSL terminal. Windows drives are mounted under /mnt/.
Step 5: Initializing GIT and Obsidian
Using WSL navigate to the folder created for your vault
cd /mnt/<drive letter>/<path to vault>

#example cd /mnt/d/Th3Malwar3Club
Once inside the vault, let’s link it to your Github repository: Note: these commands should be on the main page once you create your repo
git remote add origin https://github.com/RMondGP/Th3Malwar3Club.git
git branch -M main
git push -u origin main

#if an error occurs here I had to research it's because there is no .git
git init

#additional errors might occur, so try to setup it appropiately
git config --global user.name <"your github username">
git config --global user.email <"email address for github">

#error might have stopped here and you may not need that third command push main but try

git push --force origin main

#else move to using obsidian and it should correct itself
After running these commands successfully in your WSL terminal, your local folder is now a Git repository connected to GitHub! You’ve done the heavy lifting.
Step 6: Sync with Obsidian’s Git Plugin
To make future syncing super easy, install the Git plugin within Obsidian:
- Open up Obsidian
- Click Open folder as Vault
- Click the folder you created for the vault
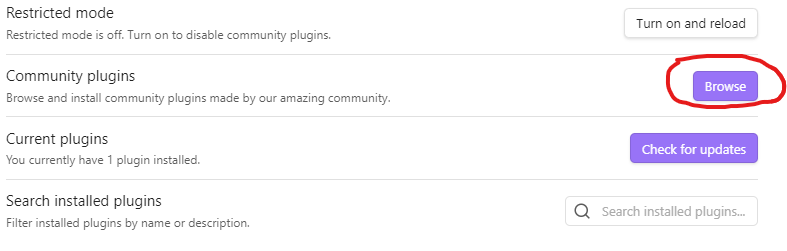
username.github.io - Once opened, go to settings by clicking the gear to the right of your folder
 5. Navigate to community plugins where it should be restricted, accept the risk
6. Browse for plugins
5. Navigate to community plugins where it should be restricted, accept the risk
6. Browse for plugins
-
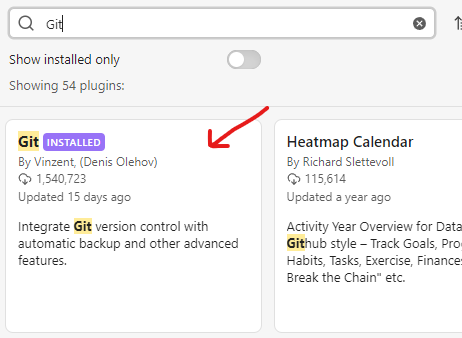
Search for the Git plugin and install
-
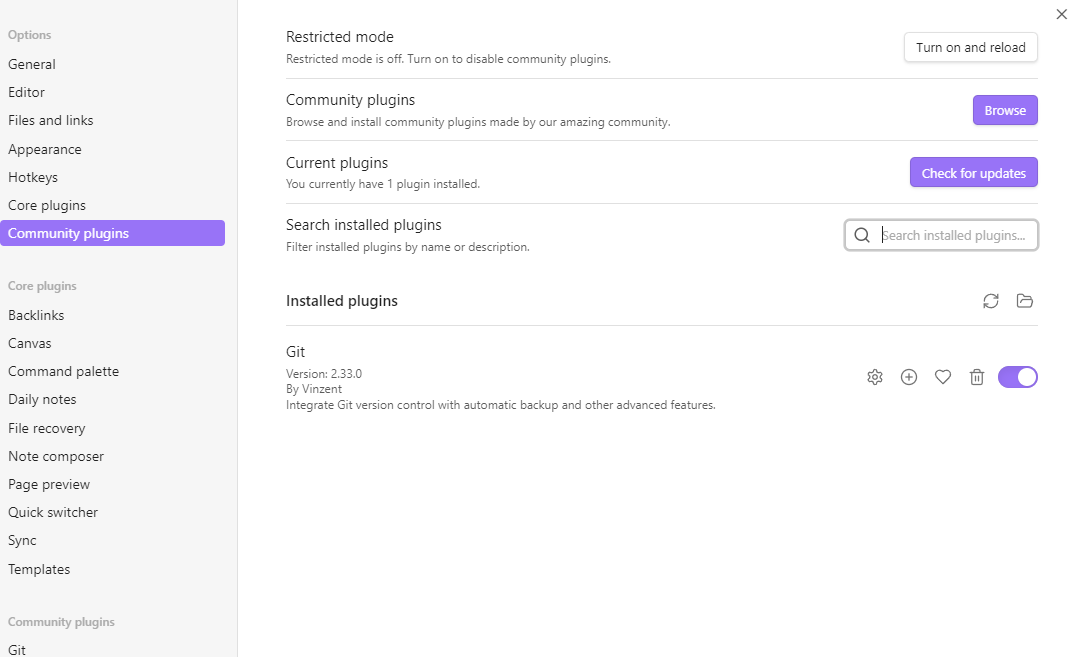
Once installed, head back to your settings and there should be a section for community plugins with Git displayed, toggle it on, if not already on
-
Exit out of settings and now obsidian should be ready for anything. You’ll now see a Git icon
 in the left sidebar. Click it to open the Git Source Control panel on the right. This panel lets you pull changes from GitHub, commit your local edits, and push them back to your repo – all without touching the command line! .
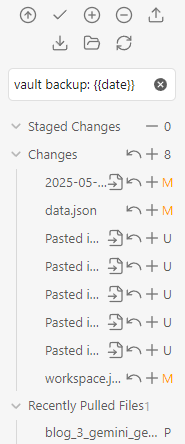
-
Alternatively, use the command palette
 or (
or (Ctrl/Cmd + P) and type “Git Push”, “Git Pull”, or “Git Commit” for quick actions.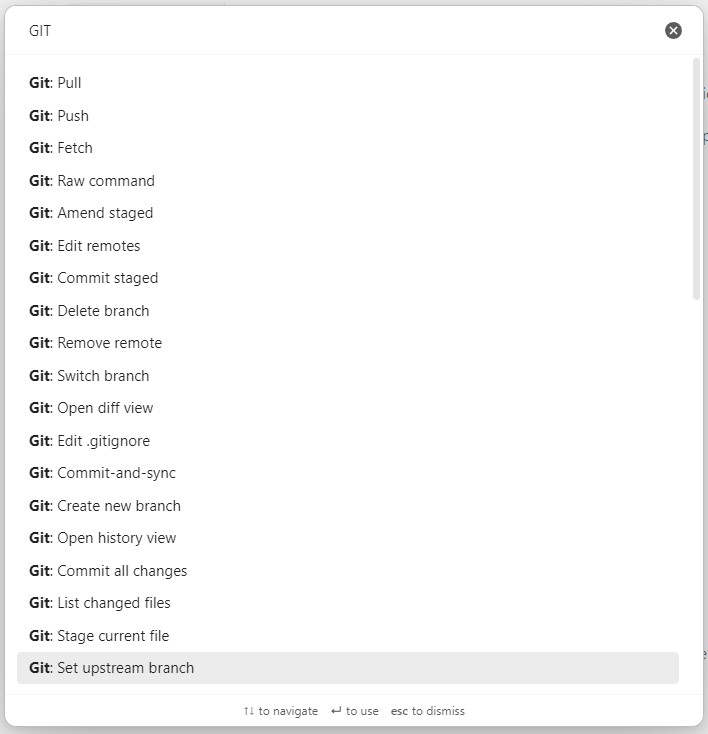
That’s it! Your Obsidian vault is now linked to GitHub, and you can use the plugin to easily sync your notes. Publish your brilliant thoughts to the web with just a few clicks!
Happy note-taking and publishing!
2025-05-04-Creating a GitHub-Page is a Pain © 2025 by Rmondgp is licensed under CC BY-NC 4.0![]()
![]()
![]()